Showing posts with label children's craft projects. Show all posts

11/8/11

Things to Make - Milk Carton Cradleboards

top

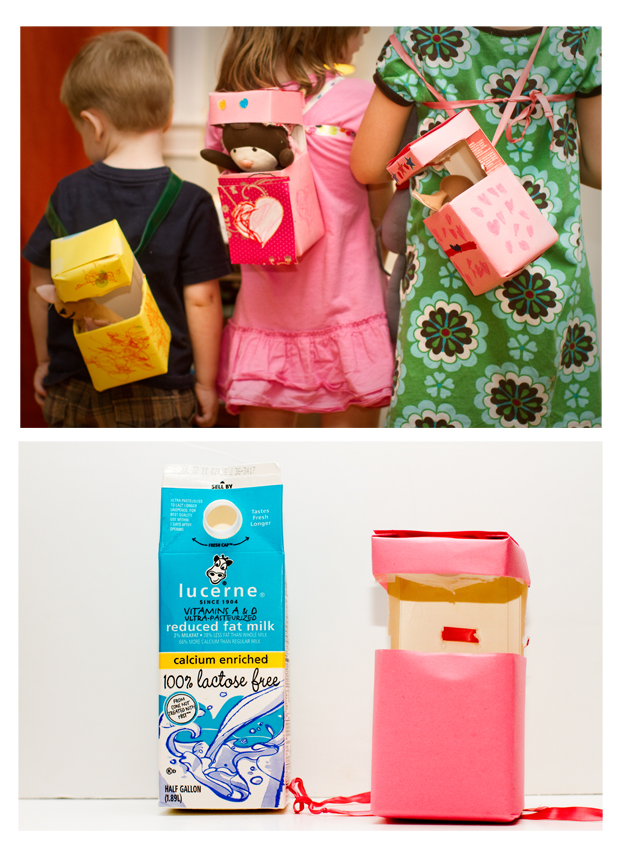
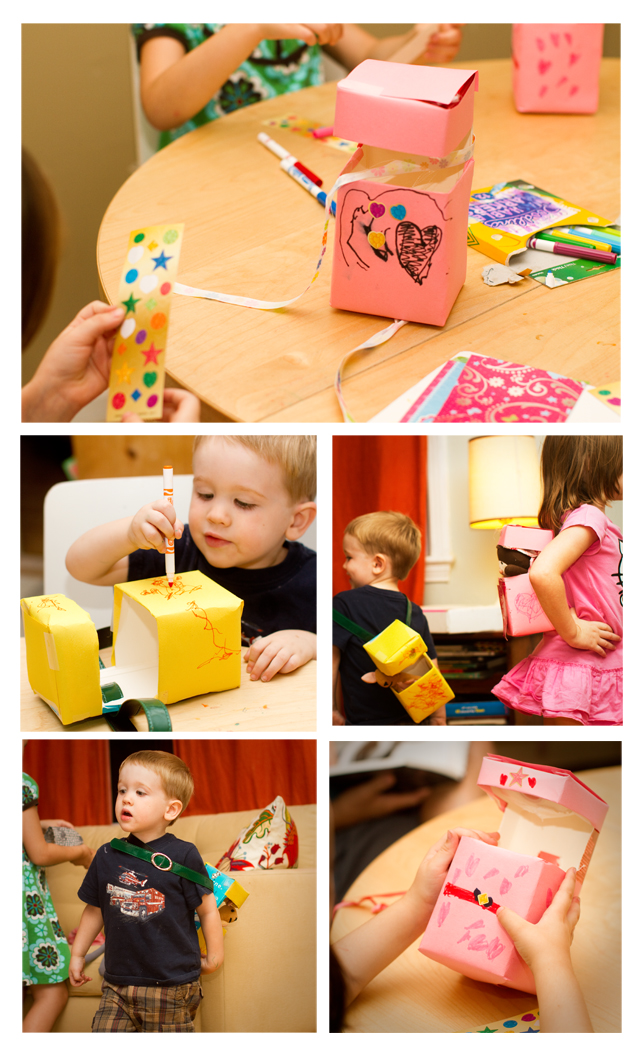
We made these a few weeks ago, but (somewhat astonishingly) they have stuck around. T wears his cradleboard around the house a lot and sometimes on the walk to school. And the girls enjoy taking their stuffed animals for walks in the carriers. After we returned from Mackinac Island the girls wanted to make an American Indian craft (the fort had a lot of exhibits on the island's Native American history), so we perused our favorite craft book, More Than Moccasins: A Kid's Activity Guide to Traditional North American Indian Life (A Kid's Guide series) and the girls insisted that their dolls NEEDED backpack-style carriers.

Here's the scoop:


You'll need: 1/2 gallon milk carton, colored paper, an old belt or ribbon, tape, glue, and scissors

1. Fold and tape down the top of the milk carton so it lays flat.

2. Cut away three sides of the carton (leaving the back) (see attached pictures to see how to make the cuts).

3. Cut two slits in the back of the carton for attaching a belt or ribbon (for T's we used a belt, for the girls' we used ribbon).

4. Cover the sides with construction paper.

5. DECORATE!!

For more Native American crafts and books on Native Americans and Thanksgiving, click here (perfect for thanksgiving).

DON'T FORGET
- tomorrow is the LAST DAY to enter our giveaway for a copy of the Sand Castle CD. Please please take some time to enter. This CD from a local artist is fantastic, trust me, you and your kids will LOVE it. Click here for the info.

OTHER CREATIVE IDEAS FROM AROUND THE WEB:


*I love Under the Pecan Tree's printmaking activity - with paint and q-tips.

*Painting in bottles.

*Cloud dough at Not-So-SAHM looks fun.

*A list of nature activities at Frugal Family Fun, I love the painted sticks and the autumn scavenger hunt list.

*DIY scratch art pages.
make

9/6/11

Things to Make - Swirly Stones

color

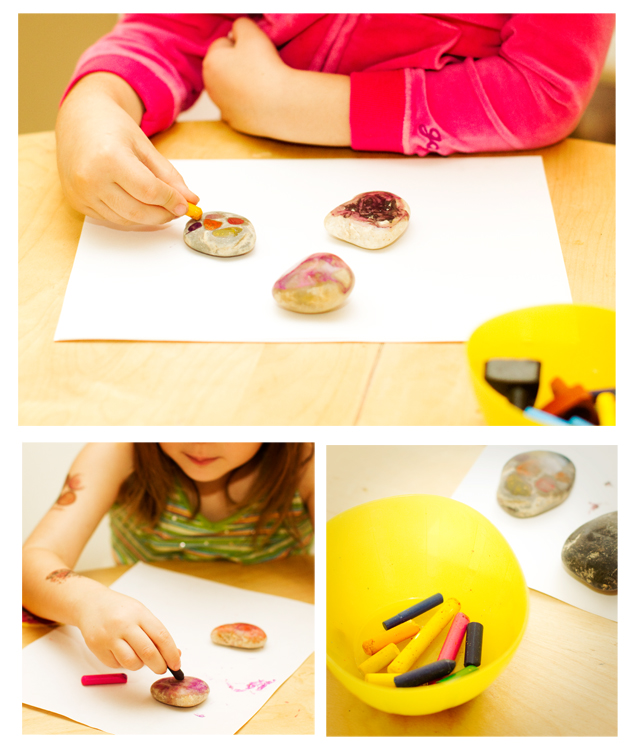
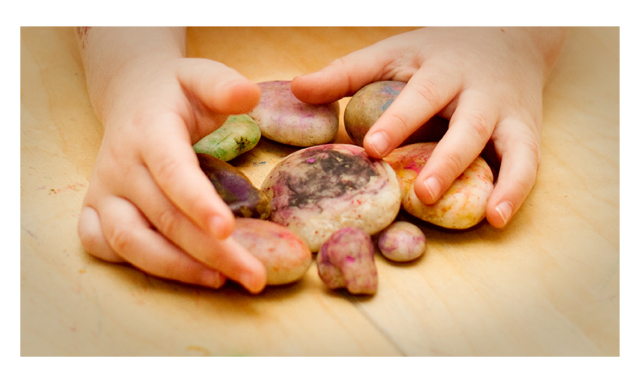
Honestly, this was one of my favorite craft projects ever. Watching the crayon melt onto the rock was mesmerizing, I couldn't stop coloring (nor could the girls), though this activity is NOT appropriate for toddlers, so we waited for T to nap before we began. Here's the scoop:

1. Find rocks. We went on a rock scavenger hunt through the neighborhood, but we only found a few. Luckily, I had a bowl of decorative rocks (from Ikea) that we used. Though in retrospect I think this project would work best on "found" rocks as the decorative ones were really shiny, so the crayon didn't show up as well.

2. Bake stones in the oven on a foil-lined pan for ten minutes at 225 degrees.

3. Remove stones from oven using a pot holder (be careful they are HOT!!) and place on paper.

4. Color on the stones using old crayons (with the wrappers removed) watch the wax melt onto the rock.

5. VOILA beautiful swirly stones!!

collect

OTHER CREATIVE IDEAS FROM AROUND THE WEB:

*Tape resist art. Looks fun and easy.

*Lego stamping - this looks so fun, I wish I would have thought of it myself.

*This little paper dollhouse is the cutest thing ever. And a link to the PDF makes it easy to make your own.

*An indoor retractable clothesline fort. Genius.

*Fairy houses made out of milk cartons. I love it!

*I really want to make our own root beer. Has anyone ever tried it?

1/18/11

Things to Make - Marbleized Paper w/Shaving Cream

both

Last week I posted about making marbleized paper with oil and watercolors. The kids loved it so much that I figured I'd attempt another marbleized project, this time with shaving cream. Shaving cream induced marbleization is all over the web (for both kids and adults), I think I first learned of the technique a few years ago while reading a magazine in the doctor's waiting room. I googled for a refresher and found this tutorial on WikiHow.

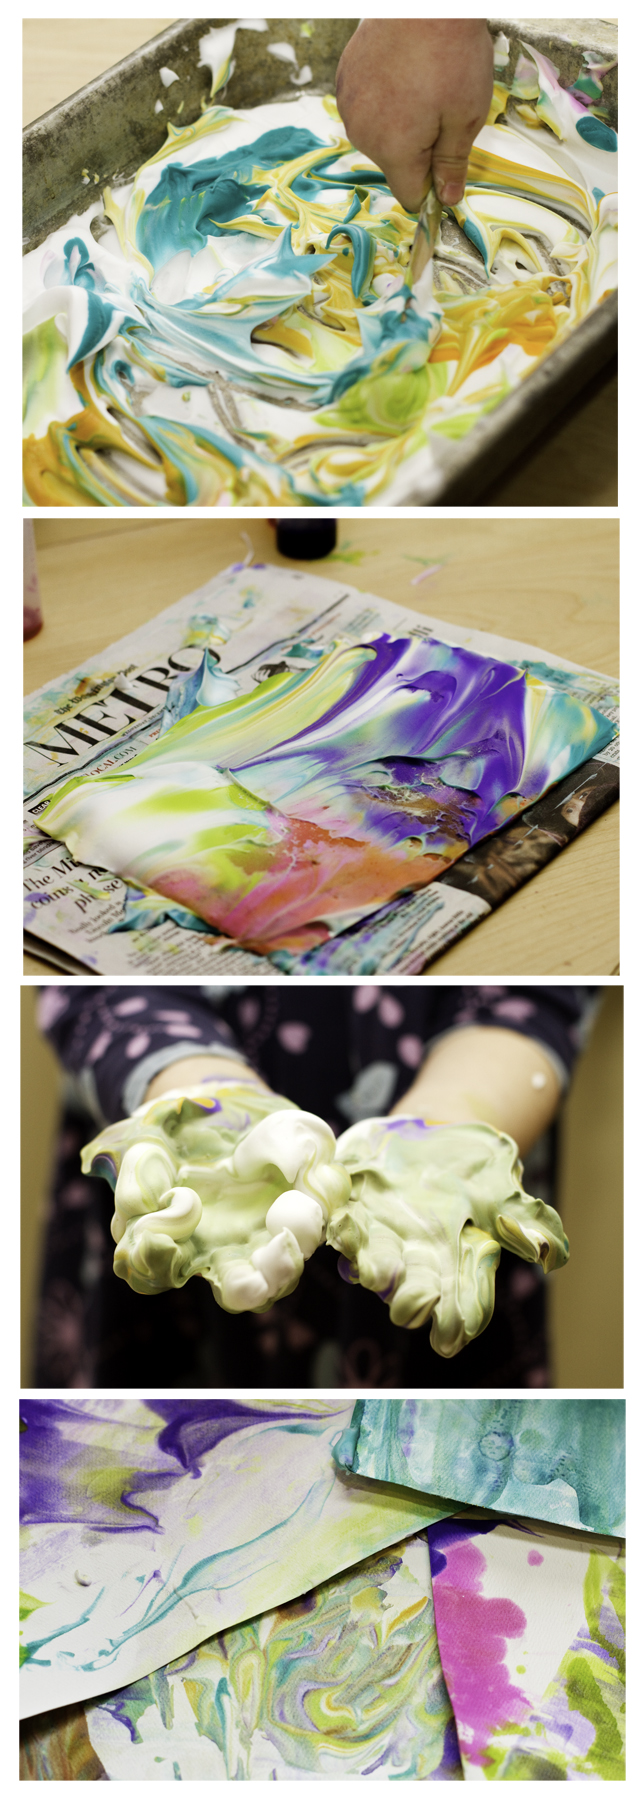
On the upside, both girls really seemed to like this project (almost, but not quite, as much as marbleizing with oil). P, in particular, loved the feel of working with shaving cream (which is pretty normal, according to A Passion for Play occupational therapists frequently use shaving cream for working - and playing - with kids. And A Passion for Play suggests different activities to try with shaving cream). Plus, the resulting papers were quite lovely (if I do say so myself). On the downside, the smell of shaving cream (especially in a small kitchen) was a little overwhelming (to put it mildly). And all the paper ended up smelling like shaving cream, making it an odd choice for gift giving.

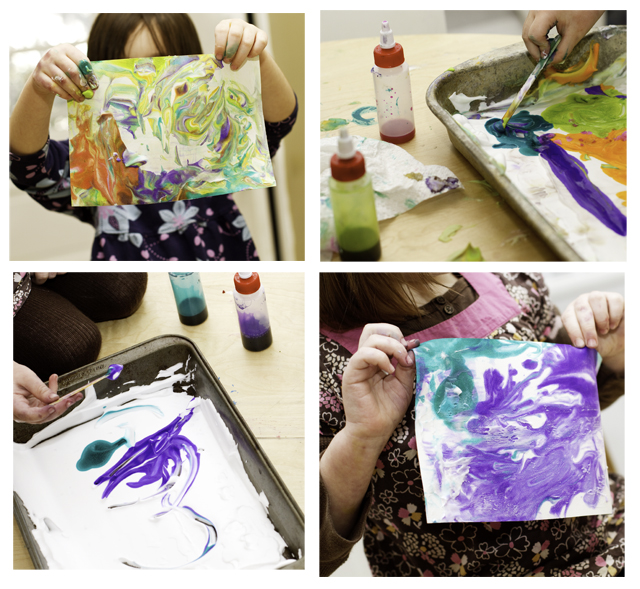
Here's the scoop: You need - a pan, shaving cream, liquid watercolors or food coloring, a squeegee (or anything flat, like a CD case or even a hard piece of cardboard), and popsicle sticks or forks.

1. Squirt the shaving cream into the pan and use the squeegee (or squeegee equivalent) to make it level and even.

2. Squirt the liquid watercolors (or food coloring) into the pan (on top of the shaving cream). I put the liquid watercolors in several small little bottles (click here to see the ones we used) to make it easier for the girls to handle.

3. The girls used popsicle sticks (but forks would also work) to push the paint around in the shaving cream. This was actually really pretty (well, until they used too much paint and everything turned grey).

4. Place a piece of paper on top of the now colored shaving cream.

5. Scrape the shaving cream off of the paper with the squeegee, a marbleized pattern will remain on the paper.

shavingcream

LinkWithin

Related Posts Plugin for WordPress, Blogger...