Showing posts with label valentine's day. Show all posts

2/14/17

Things to Make - A Valentine's Photo Collage from Pinhole Press (and an Important Lesson About Spelling)

darcytroutman (1 of 1)

Dan always asks me to print more of my photos, but I never rise to the occasion. I have trouble deciding what sizes to purchase or how/when/where to frame. In the past, in order to save money, I purchased frames from Ikea, but they keep falling off the walls (which is probably due to my poor hanging skills).

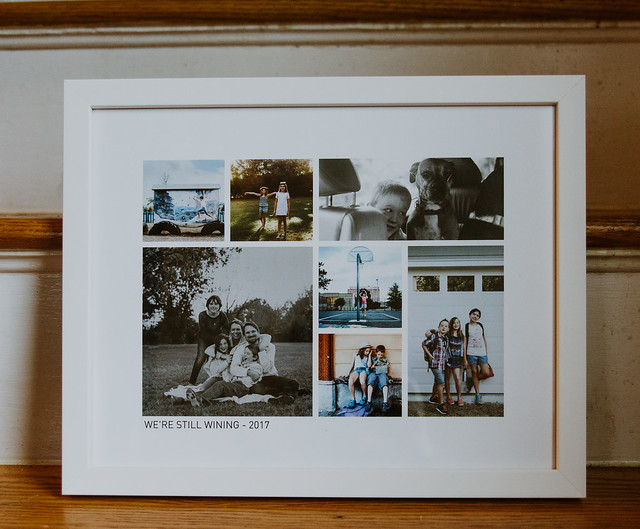
So I was quite smitten when I saw the framed photo collages on Pinhole Press's website (click here to check them out). And the fact that you can personalize one made it the perfect Valentine's Day gift for Dan. Since I leave everything to the last minute, I quickly found some of my favorite photos, finalized the collage, and hit the checkout button within moments of the shipping deadline (yay me!).

Did I mention I did this all quickly?

As much as I yell at my kids to CHECK their homework, I forgot to check my own. So instead of winning in 2017, we're "wining."

On the upside, when P's friend asked me if I just made wine drinking into a verb, I could respond, "yes, Mira, yes I did." And we do drink a lot of wine.

So maybe this version was meant to be. Because (if you haven't noticed) I love to make up words. And wining might be my best one yet.

HAPPY VALENTINE'S DAY!!

** Note - The collage was provided by Pinhole Press, but the spelling mistakes are entirely my own (as are all opinions expressed).

2/11/14

Things to Make - Fortune Cookie Valentines

untitled (13 of 17).jpg

untitled (9 of 17).jpg

A few weeks ago, our neighbor brought us fortune cookies. According to the tiny strips of paper inserted inside each cookie, we all had uninteresting destinies (except for T's "you are not a person who can be ignored"), so the kids discussed the predictions they would draft. And then I (rather randomly) said, "well, let's try baking our own fortune cookies." And now we can't stop.

Turns out fortune cookies make for a great "team" baking experience - one kid writes and cuts out the crazy fortunes (this would be F), while another child (P) helps fold and insert the fortunes before the cookies harden (basically "speed" baking).

Plus, I've found the 4-5 minute baking time allows me to help with homework and/or cook dinner without becoming overly distracted (i.e. I can't read a whole article in 4 minutes).

Anyways, we like them so much that we're handing some out for Valentine's Day. The best part was coming up with the fortunes - from "you will travel to all 7 continents" to "you will dance with an elephant", I'm hoping we'll make the second grade smile.

FORTUNE COOKIE RECIPE:

Ingredients:

* 1 egg white
* 1/4 tablespoon vanilla extract
* 1 pinch salt
* 1/4 cup all-purpose flour
* 2.5 tablespoons white sugar
* 1 tablespoon of water
* Empty egg carton (or muffin tin)

1. Preheat oven to 400 degrees. Write fortunes on strips of paper approximately 4 inches long and 1/2 an inch wide.

2. Butter two baking sheets. Lots of lots of butter (otherwise the cookies will stick).

3. Mix the egg white with the vanilla extract until foamy but not stiff. Add flour, salt, and sugar to the egg mixture. Add the water. If the mixture is too thick add 1 more tablespoon of water.

4. Place batter (measured out as 1 teaspoon per cookie) four inches apart on the cooking sheet. Only bake 3 at a time (if this is easy for you, then you can try to bake more in the next batch).

5. Tilt the baking sheet around to assure that the batter is in a circle.

6. Bake 4-5 minutes or until the outer edge of the cookie turns a golden brown (JUST the outer edge).

7. Remove cookies from the cooking sheet using a spatula (I slowly pushed them off the sheet) and place on a wooden cutting board. QUICKLY, place the fortune in the middle of the cookie and fold in half. SUPER QUICKLY fold the cookies again by putting them into the empty egg carton (which I found to work much better than a muffin tin).

- Makes 12 cookies.

(adapted slightly from this allrecipes.com)

untitled (4 of 17).jpg

2/12/13

Things to Make - Cherry Heart Pies

untitled (18 of 21).jpg

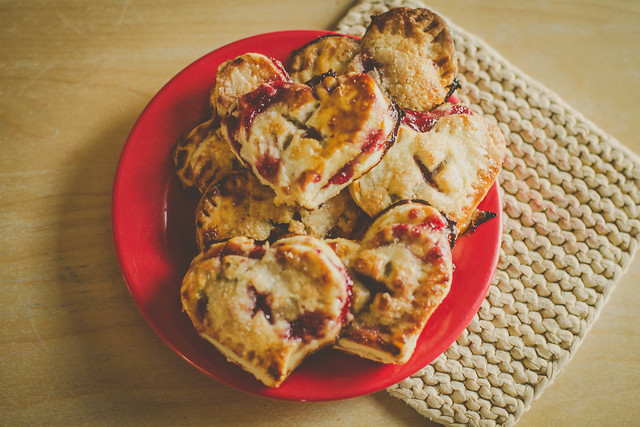
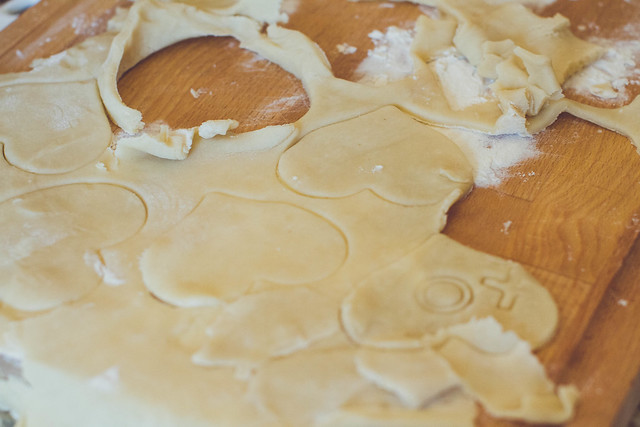
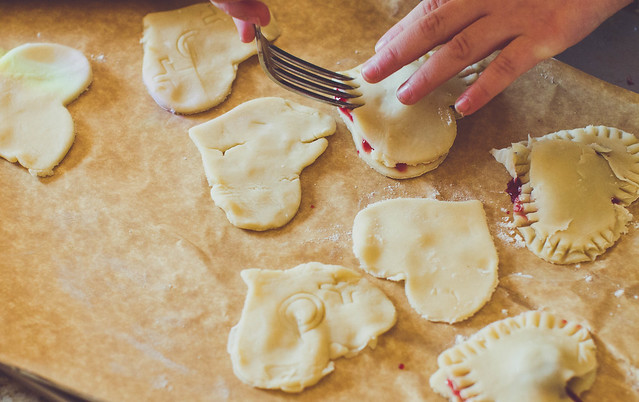
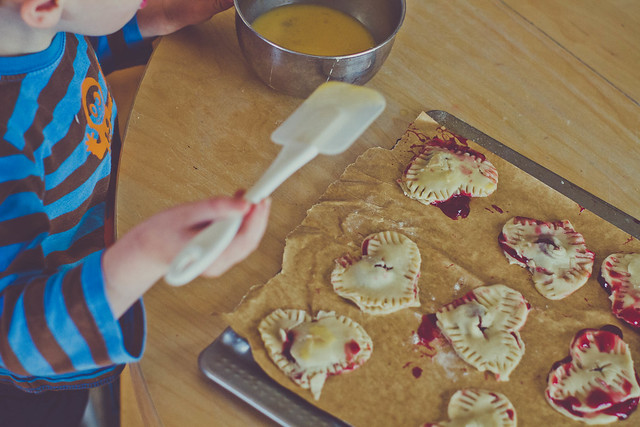
For whatever reason, Valentine's Day has become our baking holiday. Last year, we couldn't stop making heart-shaped pastries, so this year, as soon as I saw cherry heart pies in the Artful Parent's Winter Ebook (tons of great stuff in there, I highly recommend purchasing a copy), I knew they would make the perfect February snack. The kids managed to complete most of the steps all by themselves - F rolled the dough and cut out the hearts (using a cookie cutter), while P spooned in the cherry filling and sealed the pies with a fork. T brushed them all with the egg wash. And everyone loved eating them. A total win.

Here's the scoop (slightly modified from the Artful Parent's recipe):

INGREDIENTS

* 1 can (or bottle) preserved cherries in syrup
* 2 tablespoons cornstarch
* 1/3 cup sugar, plus extra for sprinkling
* 1 recipe pie crust (the Artful Parent bakes her own (click here for the recipe), we used store bought)
* Egg wash (1 egg whisked with 1 tablespoon water)
* 3 inch heart-shaped cookie cutter.

INSTRUCTIONS

1. Mix the cherries, half the liquid from the bottle or can, sugar and cornstarch in a pot. Cook over medium heat, stirring regularly, for 8-10 minutes or until the liquid turns thick, gels, and bubbles. Remove from heat and let cool.

2. Preheat oven to 425 degrees F and line 2 cookie sheets with parchment paper. Also, bring the pie crust dough out of the fridge to soften slightly (15 min).

3. Roll out half of the pie crust on a floured surface. Use the cookie cutter to cut hearts out of the dough. Transfer to parchment-paper-lined cookie sheets.

4. Spoon a couple tablespoons of cherry filling onto the center of each heart.

5. Cover each with a second dough heart. Press the edges closed with fork tines.

6. Use a sharp knife to cut an X (for a kiss) in the top crust. Brush each hand pie with egg wash, then sprinkle with sugar.

7. Bake for approximately 20 minutes, or until crust is golden brown at edges. (Note - watch them carefully, our first batch burned a little bit)

8. EAT!

untitled (1 of 21).jpg

untitled (11 of 21).jpg

untitled (4 of 21).jpg

untitled (16 of 21).jpg


2/14/12

Things to Make - Heart Shaped Pastries for Valentine's Day

done

We've been making these a lot lately (I've stocked our freezer full of puff pastry). The cookbook (Williams-Sonoma Kids Baking, still my favorite kids' cookbook ever) calls them elephant ears, but that sounds less interesting than my title. The recipe is easy in that you don't need many ingredients and it has the perfect amount of steps to keep kids' entertained. Plus all the measurements can be approximated, making it hard to mess them up. So tasty.

Happy Valentine's Day everyone!!

HEART SHAPED PASTRIES:


Ingredients:
*3 tablespoons butter
*1/2 teaspoon vanilla extract
*1/2 cup sugar
*1/2 cup confectioners' sugar
*frozen puff pastry, 1 sheet, 9.5 inch square, thawed

1. Preheat oven to 375 degrees
2. Line 2 baking sheets with parchment paper OR grease with butter
3. Melt butter in a small saucepan over medium-low. Move to a heatproof service and add the vanilla.
4. Stir together the two sugars in a small bowl, set 1/2 cup of the mixture aside.
5. Sprinkle a cutting board with 3 tablespoons of the sugar mixture. Unfold the puff pastry on top of the sugar. Sprinkle more sugar on top of the pastry. Spread evenly with your hands.
6. Use a rolling pin to flatten the puff pastry to a 10x20 inch rectangle. After every few rolls, sprinkle the puff pastry with more sugar.
7. Brush the melted butter evenly over the pastry with a pastry brush. Sprinkle the reserved 1/2 cup of reserved sugar mixture over the pastry.
8. Fold the pastry - starting at one end, fold a 2-inch-wide band onto itself. Repeat folding until you reach the center of the pastry. Now fold the other end of the rectangle the same way. Fold one band on top of the other to form a long rectangle about 2.5 inches wide and 10 inches long.
9. Put the rectangle on a cutting board and slice into 1/2 inch thick slices. Place slices cut side down on the baking sheets.
10. Bake 15 minutes. If using parchment paper, let the pastries cool for 10 minutes then move to a rack. If using a greased baking sheet, remove the pastries from the sheet immediately and let cool on a rack.
11. EAT!!

make1

make2


2/13/12

Things to Do - Valentining

create

Every year all the great homemade Valentines posted throughout the web inspire me. Then I remember that the days preceding Valentine's Day are some of the most peaceful in our house as the girls use this time to create on their own terms. They do not want my help or input, they have their own ideas and they take them seriously. P and F sit at the table for hours, coming up with new layouts, writing all their friends' names, trying to personalize all the cards in one way or another.

So I catch up on old New Yorkers for awhile (I particularly loved this fantastic article on planting trees to hold back the Sahara). Or (more often) I chase T around the house and beg him not to destroy anything (while carrying a New Yorker and attempting to read it).

Anyways, the girls take their task SERIOUSLY, i just provide the materials needed for masterpieces - this year we agreed on tons of hearts, jewels, and princess stickers from Oriental Trading. The jewels are my favorite. Love that bling.

What are you making for Valentine's Day? I'd love to hear!


MONDAY LINKS:

*I love everything about this apartment. I want to move in.

*44 Weeks of Words.

*99 Designers Reveal Their Fall 2012 Inspirations. So fun to click through and see the diversity of ideas.

*Beautiful pictures of China's changing coastlines.

ribbon

Of course, we require dance breaks. Our new ribbons really get the party started.

paperdolls

And paper doll breaks.

blocks

T and I made castles for the paper dolls. Unfortunately, most of the dolls fell apart before they have a chance to settle into their new homes.

2/7/12

Things to Make - A Valentine's Day/ Welcome Home Banner

done

Dan spent most of last week traveling for work, so for his return the kids and I decided to make a Valentine's Day/Welcome Home banner. I've been seeing all these great watercolor painting projects around the web lately*, which I couldn't wait to try out with the kids. But all three children already had their own ideas for dad's banner. F insisted we use pink and red construction paper and markers (her favorite art supply these days). P insisted on using crayons. And T really wanted to paint (T always wants to paint). So I shelved my fancy ideas and let the kids create on their own terms. T, of course, finished painting and coloring his hearts in about five minutes. P spent about 25 minutes on her creations and F spent a good part of the morning. Which is how these things often go.

I taped all the kids' hearts to a string and hung the final product on our kitchen island. And when Dan came home Saturday night, we celebrated like crazy.

**Other Watercolor Painting Projects to Try with Your Kids:

*I love these gravity-painted cards created with watercolor paint and water.

*This is a similar take on the project above, just wet watercolor paper and let your kids paint. By using tape to create a frame (then peeling the tape off when the paint dries) the result is much "fancier" then most kids' art projects. Totally wall-worthy.

*Watercolor silhouettes. For Valentine's Day you could use heart stencils instead of animal stencils.

*And in case you don't have any watercolor paint around the house, here's a recipe on how to make some, using kitchen staples and food coloring.

**Other Valentine's Day Banners From Around the Web:

*From Not-So-SAHM, a tie-dye heart garland using coffee filters, water, and do-a-dot markers. I love how this turned out.

*I love this heart-chain made with just a stapler and strips of paper. Such a simple idea, but yet I never thought of it.

*Lace, modpodge, and cookie-cutter molds = beautiful.

make


2/14/11

Things to Make - Valentine's Cookies

heart

As I've mentioned in previous posts, I'm not a baker. And in the realm of baking nothing terrifies me more than cookies (I actually make a killer cupcake). It's sort of embarrassing, I consider myself a decently intelligent person, but cookie dough and I don't mix. The dough always ends up not sticky or too sticky. I just don't get it. I think I need lessons. But F has declared her favorite holiday as Valentine's Day and, once you have children, you really appreciate a holiday that doesn't involve expensive gifts and preparation (and I'm sufficiently old enough that I've forgiven Valentine's Day for the tearful nights and tequila shots of my college years). With all this in mind, I promised F we could make special cookies to celebrate her favorite holiday. And we made it through, though P kept saying "wow, mom, you're really bad at this."

The Scoop:

Materials - Store bought refrigerated cookie dough (is there any other kind?), cookie cutters, a rolling pin (or, in our case, a wine bottle), Wilton Pink Sparkle Gel and pans.

1. First I tried to roll the dough out. But it kept flaking. So I added flour. My husband came in and explained to me that this made the problem worse (who knew?), so I added oil. What a mess.

2. The girls liked placing the cookie cutters in the dough and separating out the cookies. But they couldn't understand why everything was either too sticky or not sticky enough. Nor could I.

3. Finally we cobbled together some cookies. Some were thick some were thin. What a mess.

4. After the cookies finished baking, I let the kids decorate them with cake decorating gel (and T used sprinkles). This part was fun.

5. The results actually ended up pretty yummy. Though next project I'll probably jump back into my comfort zone. In the future, my husband promised he'd teach me how to make chocolate chip cookies, from scratch nonetheless. I'm excited about it, so at least something valentinesesque came out of the day.

HAPPY VALENTINE'S DAY EVERYONE!!

LINKS:

*Today's Groupon - only $15 for spaworld. I love this place, click here for my review.

*These decorating ideas for kids' rooms are just lovely. I want to buy them all (especially the rug).

*Are these the best pictures of the year? According to World Press Photo they are. What do you think? Definitely worth a look.

*Wow, these birds in winter are breathtakingly beautiful.

*The Coveteur blog resembles a fashion-focused Selby. Lots of fascinating/quirky/lovely stuff, check it out (link via http://finetingogsjokolade.blogspot.com/).

*Loving these pics of the 1969 women of Princeton.

create

2/8/11

Things to Make - Wax Paper Hearts

wax

Last weekend, F, was home sick with a fever. After the tylenol kicked in, I thought we'd try making wax paper hearts (project idea from the Artful Parent) while T napped and P playdated at a friend's house. I couldn't quite gauge how much F liked this project, she seemed a little bored by it. But then a few days later, when she felt better and P returned, she asked, "can we please make window hearts again? P you're going to love this project, it's so BEAUTIFUL." And they both really seemed to love putting the hearts in the window and watching them glow (the ironed paper produces a lovely stained glass effect).

Here's the scoop:

You'll need: Crayon shavings (I used a cheap cheese grater, but you can also use a pencil sharpner), wax paper, an iron, and scissors.

1. I asked the girls to make patterns and designs with the crayon shavings on the wax paper. I tried to prolong this part as long as possible by saying things like "wow, that's beautiful! What were you think of when designing it?"

2. We then placed a new piece of wax paper on top of the decorated sheet.

3. Iron the wax paper on low. I placed a kitchen towel between the iron and the paper to make sure that the paper didn't melt onto the iron.

4. We then traced hearts onto the melted paper using our heart stencils. After cutting the hearts out, we taped them to the window. Originally I planned on making a heart mobile, similar to the Artful Parent and Martha Stewart, but my motivation was not high enough.

What about everyone else? Any creative Valentine's Day ideas?

2/1/11

Things to Make - Stencil Valentines

love

Throughout December, the girls could not get enough craft projects. F would come home from preschool asking "can we make something today? please?" I have to admit, their attentions flattered me. Then came January. And all of a sudden they were back in their room, door closed, playing together and when I asked about craft projects I heard "maybe in awhile mom." So I adopted a new strategy - lots of materials, little parental involvement - just a table full of glue sticks, scrapbook paper, scissors, markers, construction paper, stickers, and STENCILS. And, hence, the valentine making began. So I'm lying low for awhile, only interceding when needed (usually to help spell all of their friends' names).

Regarding the stencils, both girls love hearts but have a hard time drawing them, so I made a heart stencil out of cardboard that has gotten a lot of use. So much use that I decided to buy more, I found this stencil book - Fun with Valentine Stencils (Dover Little Activity Books)on Amazon for only $1.50 (Amazon has a huge selection of these cheap Dover stencils to choose from). For other stencil activity, a few months ago my mom bought the girls a jumbo stencil kit similar to these - NEX Jumbo Stencil Kit (Farms And Horses) and NEX Stylin Stencil (Runway Fun) - and the girls still use it on a frequent basis (at least once a week).

What about everyone else? Any ideas for Valentine making?

OTHER IDEAS FOR CREATIVE KIDS AROUND THE WEB:

*I love this story starter idea, sounds perfect for the numerous sick days that tend to make up February.

*The Artful Parent's painted heart cookies are just lovely. Edible art.

*Toothpicks + marshmallows = art. What a great (and easy) way to spend an afternoon.

*These shaving cream valentines are lovely. A wonderful idea for free play as well.

*I love these paper towel roll valentine's stamps. Plus, this project really does look super easy.

cardboard

LinkWithin

Related Posts Plugin for WordPress, Blogger...