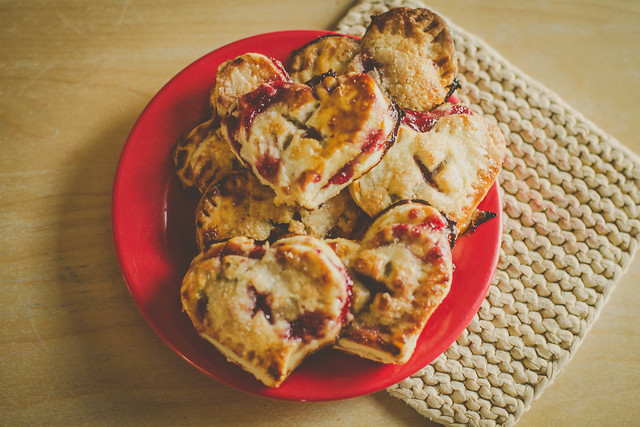
For whatever reason, Valentine's Day has become our baking holiday. Last year, we couldn't stop making heart-shaped pastries, so this year, as soon as I saw cherry heart pies in the Artful Parent's Winter Ebook (tons of great stuff in there, I highly recommend purchasing a copy), I knew they would make the perfect February snack. The kids managed to complete most of the steps all by themselves - F rolled the dough and cut out the hearts (using a cookie cutter), while P spooned in the cherry filling and sealed the pies with a fork. T brushed them all with the egg wash. And everyone loved eating them. A total win.
Here's the scoop (slightly modified from the Artful Parent's recipe):
INGREDIENTS
* 1 can (or bottle) preserved cherries in syrup
* 2 tablespoons cornstarch
* 1/3 cup sugar, plus extra for sprinkling
* 1 recipe pie crust (the Artful Parent bakes her own (click here for the recipe), we used store bought)
* Egg wash (1 egg whisked with 1 tablespoon water)
* 3 inch heart-shaped cookie cutter.
INSTRUCTIONS
1. Mix the cherries, half the liquid from the bottle or can, sugar and cornstarch in a pot. Cook over medium heat, stirring regularly, for 8-10 minutes or until the liquid turns thick, gels, and bubbles. Remove from heat and let cool.
2. Preheat oven to 425 degrees F and line 2 cookie sheets with parchment paper. Also, bring the pie crust dough out of the fridge to soften slightly (15 min).
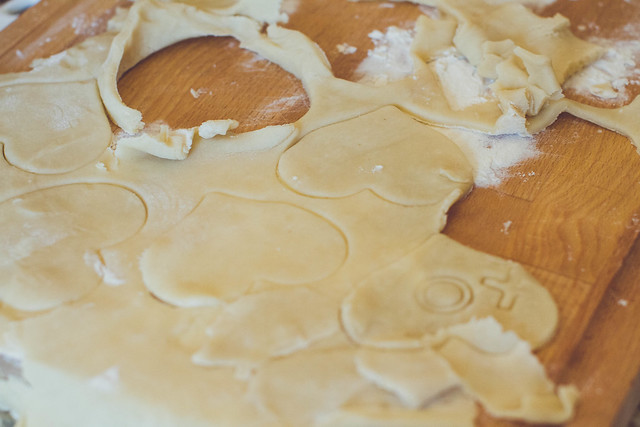
3. Roll out half of the pie crust on a floured surface. Use the cookie cutter to cut hearts out of the dough. Transfer to parchment-paper-lined cookie sheets.
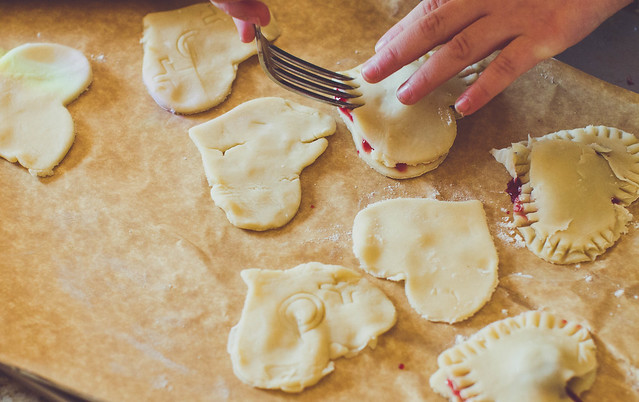
4. Spoon a couple tablespoons of cherry filling onto the center of each heart.
5. Cover each with a second dough heart. Press the edges closed with fork tines.
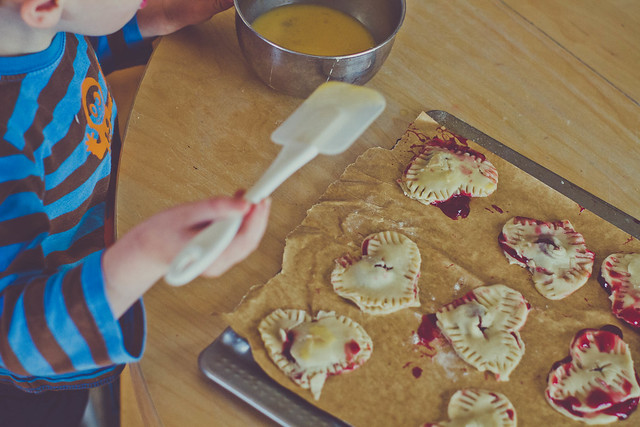
6. Use a sharp knife to cut an X (for a kiss) in the top crust. Brush each hand pie with egg wash, then sprinkle with sugar.
7. Bake for approximately 20 minutes, or until crust is golden brown at edges. (Note - watch them carefully, our first batch burned a little bit)
8. EAT!

No comments:
Post a Comment